Apache Thrift와 Spring Boot를 사용하여 마이크로 서비스 구축
개요
마이크로 서비스에 구축하는데 있어서 서비스에 엄격하고 다국어 클라이언트를 제공하는 것이 중요하다. API를 자체 문서화를 해야 한다. 이를 위한 매우 효율적인 도구 중 하나는 Apache Thrift이다.
여기서는 Spring Boot에서 Apache Thrift를 적용하는 방법을 설명하려고 한다.
Spring boot 프로젝트 생성
먼저, 아래와 같이 curl 명령어를 사용하여 Spring Boot 초기 프로젝트를 생성한다.
curl https://start.spring.io/starter.tgz \
-d bootVersion=2.7.12 \
-d dependencies=web \
-d baseDir=spring-thrift \
-d groupId=com.devkuma \
-d artifactId=spring-thrift \
-d packageName=com.devkuma.calculator \
-d applicationName=CalculatorApplication \
-d packaging=jar \
-d javaVersion=11 \
-d type=gradle-project | tar -xzvf -
위 명령어를 실행하게 되면 Java 11, Spring Boot 버전은 2.7.12로 web 프로젝트가 생성된다.
Gradle 빌드 스크립트
Thrift 라이브러리 추가
build.gradle 빌드 파일에 의존성으로 thrift 라이브러리, httpcore 라이브러리를 추가한다.
dependencies {
	implementation 'org.springframework.boot:spring-boot-starter-web'

	implementation 'org.apache.thrift:libthrift:0.18.1'
	implementation 'org.apache.httpcomponents:httpcore:4.4.16'

    testImplementation 'org.springframework.boot:spring-boot-starter-test'
}
Thrift Plugin
Gradle Thrift 플러그인은 Thrift 컴파일러를 사용하여 Thrift IDL 파일을 컴파일한다.
이 플러그인을 사용하려면 빌드 스크립트에 다음을 추가한다.
plugins {
    id "org.jruyi.thrift" version "0.4.2"
}
Thrift Task도 추가한다.
compileThrift {
    recurse true

    generator 'html'
    generator 'java', 'private-members'
}
이것으로 Thrift 빌드 컴파일를 하게 되면 아래 디렉터리에서 Thrift으로 생성된 Java 파일을 확인할 수 있게 될것이다.
build/generated-sources/thrift
Thrift 템플릿
Thrift 템플릿 파일 생성
Apache Thrift에 익숙하지 않더라도 템플릿 파일은 매우 이해하기 쉬운 편이다.
아래 파일을 src/main/thrift/calculate.thrift에 생성한다.
namespace cpp com.devkuma.calculator
namespace d com.devkuma.calculator
namespace java com.devkuma.calculator
namespace php com.devkuma.calculator
namespace perl com.devkuma.calculator

enum TOperation {
  ADD = 1,
  SUBTRACT = 2,
  MULTIPLY = 3,
  DIVIDE = 4
}
exception TDivisionByZeroException {
}

service TCalculatorService {
   i32 calculate(1:i32 num1, 2:i32 num2, 3:TOperation op) throws (1:TDivisionByZeroException divisionByZero);
}
여기에서는 calculate라는 메서드 하나만 사용하여 TCalculatorService를 정의하였다. TDivisionByZeroException 타입의 예외를 발생 시킬 수 있다.
Thrift으로 Java 생성
생성한 thrift 템플릿 파일은 아래 명령어로 Java 파일을 생성할 수도 있지만, 여기서는 gradle 설정으로 쉽게 컴파일하도록 수정했기에 실행해야 하는 경우는 없을 것이다.
thrift --gen java calculate.thrift
Thrift 템플릿 파일 컴파일
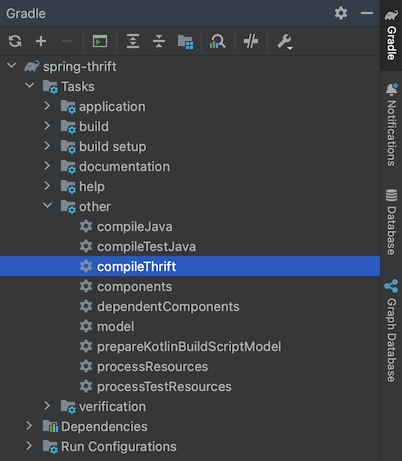
그럼 컴파일 해보자. 위에서 gradle로 만들어 놓은 “complieThrift” 테스크을 실행한다.
Intellij IDEA라면 오른쪽 메뉴에 Gradle에서 “complieThrift” 테스트를 실행만 하면 된다.
그러면, 아래와 같이 TCalculatorService, TDivisionByZeroException TOperation 파일이 자동 생성된 것을 확인할 수 있다.
├── build
│   └── generated-sources
│       └── thrift
│           ├── gen-html
│           │   ├── calculate.html
│           │   ├── index.html
│           │   └── style.css
│           └── gen-java
│               └── com
│                   └── devkuma
│                       └── calculator
│                           ├── TCalculatorService.java
│                           ├── TDivisionByZeroException.java
│                           └── TOperation.java
클래스 생성
서비스 클래스 생성
먼저 동작 로직있는 CalculatorService를 구현한다.
package com.devkuma.calculator.service;

import org.springframework.stereotype.Service;

@Service
public class CalculatorService {

    public int add(int num1, int num2) {
        return num1 + num2;
    }

    public int subtract(int num1, int num2) {
        return num1 - num2;
    }

    public int multiply(int num1, int num2) {
        return num1 * num2;
    }

    public int divide(int num1, int num2) {
        if(num2 == 0) {
            throw new IllegalArgumentException("num2 must not be zero");
        }

        return num1 / num2;
    }
}
Thrift 핸들러 클래스 생성
다음은 Thrift 핸들러 클래스가 필요하다.
package com.devkuma.calculator.handler;

import org.apache.thrift.TException;
import org.springframework.beans.factory.annotation.Autowired;
import org.springframework.stereotype.Component;

import com.devkuma.calculator.TCalculatorService;
import com.devkuma.calculator.TDivisionByZeroException;
import com.devkuma.calculator.TOperation;
import com.devkuma.calculator.service.CalculatorService;

@Component
public class CalculatorServiceHandler implements TCalculatorService.Iface {

    @Autowired
    private CalculatorService calculatorService;

    @Override
    public int calculate(int num1, int num2, TOperation op) throws TException {
        switch(op) {
            case ADD:
                return calculatorService.add(num1, num2);
            case SUBTRACT:
                return calculatorService.subtract(num1, num2);
            case MULTIPLY:
                return calculatorService.multiply(num1, num2);
            case DIVIDE:
                try {
                    return calculatorService.divide(num1, num2);
                } catch(IllegalArgumentException e) {
                    throw new TDivisionByZeroException();
                }
            default:
                throw new TException("Unknown operation " + op);
        }
    }
}
이 예제에서는 Thrift 핸들러가 일반 Spring Bean이며, 이는 종속성을 주입할 수 있다 것을 뜻한다.
Thrift 설정 클래스 생성
그럼 다음은 Thrift 설정 클래스을 생성한다.
package com.devkuma.calculator.config;

import javax.servlet.http.HttpServlet;

import org.apache.thrift.protocol.TBinaryProtocol;
import org.apache.thrift.protocol.TProtocolFactory;
import org.apache.thrift.server.TServlet;
import org.springframework.boot.web.servlet.ServletRegistrationBean;
import org.springframework.context.annotation.Bean;
import org.springframework.context.annotation.Configuration;

import com.devkuma.calculator.TCalculatorService;
import com.devkuma.calculator.handler.CalculatorServiceHandler;

@Configuration
public class ThriftConfig {

    @Bean
    public TProtocolFactory tProtocolFactory() {
        //We will use binary protocol, but it's possible to use JSON and few others as well
        return new TBinaryProtocol.Factory();
    }

    @Bean
    public ServletRegistrationBean <HttpServlet> stateServlet(TProtocolFactory tProtocolFactory, CalculatorServiceHandler handler) {
        ServletRegistrationBean <HttpServlet> servRegBean = new ServletRegistrationBean<>();
        servRegBean.setServlet(new TServlet(new TCalculatorService.Processor <>(handler), tProtocolFactory));
        servRegBean.addUrlMappings("/calculator/*");
        servRegBean.setLoadOnStartup(1);
        return servRegBean;
    }
}
여기서는 Servlet에서 /calculator/*라 호출되도록 URL 매핑을 사용하여 설정한다.
이것으로 구현 클래스는 완료하였다.
테스트 코드
일반적으로 애플리케이션이 JSON REST API를 제공하는 경우에도 클라이언트를 구현해야 한다. Thrift은 이를 쉽게 구현할 수 있다.
서비스를 테스트 코드를 작성해 보도록 하겠다.
package com.devkuma.calculator;

import static org.junit.jupiter.api.Assertions.assertEquals;

import org.apache.thrift.protocol.TProtocol;
import org.apache.thrift.protocol.TProtocolFactory;
import org.apache.thrift.transport.THttpClient;
import org.apache.thrift.transport.TTransport;
import org.junit.jupiter.api.Assertions;
import org.junit.jupiter.api.BeforeEach;
import org.junit.jupiter.api.Test;
import org.springframework.beans.factory.annotation.Autowired;
import org.springframework.beans.factory.annotation.Value;
import org.springframework.boot.test.context.SpringBootTest;

@SpringBootTest(webEnvironment = SpringBootTest.WebEnvironment.DEFINED_PORT)
public class CalculatorApplicationTests {

	@Autowired
	protected TProtocolFactory protocolFactory;

	@Value("${local.server.port}")
	protected int port;

	protected TCalculatorService.Client client;

	@BeforeEach
	public void setUp() throws Exception {
		TTransport transport = new THttpClient("http://localhost:" + port + "/calculator/");

		TProtocol protocol = protocolFactory.getProtocol(transport);

		client = new TCalculatorService.Client(protocol);
	}

	@Test
	public void add() throws Exception {
		assertEquals(5, client.calculate(2, 3, TOperation.ADD));
	}

	@Test
	public void subtract() throws Exception {
		assertEquals(3, client.calculate(5, 2, TOperation.SUBTRACT));
	}

	@Test
	public void multiply() throws Exception {
		assertEquals(10, client.calculate(5, 2, TOperation.MULTIPLY));
	}

	@Test
	public void divide() throws Exception {
		assertEquals(2, client.calculate(10, 5, TOperation.DIVIDE));
	}

	@Test
	public void divisionByZero() throws Exception {
		Assertions.assertThrows(TDivisionByZeroException.class, () -> {
			client.calculate(10, 0, TOperation.DIVIDE);
		});
	}
}
이 테스트는 Spring Boot 응용 프로그램을 실행하고 임의의 포트에 바인딩하고 테스트한다. 모든 클라이언트/서버 통신은 실제 클라이언트와 동일한 방식으로 수행된다.
클라이언트 측의 서비스 사용 편하다는 것을 확인할 수 있다. 메서드를 호출하여 예외를 잡을 것뿐이다.
마무리
여기에서는 Spring Boot와 Apache Thrift를 사용하여 마이크로 서비스를 구축하는 방법을 설명하였다. Apache Thrift는 엄격하고 다국어 클라이언트를 제공하며 API가 자체 문서화되는 이점이 있다. 간단한 계산기 애플리케이션을 예로 들어 템플릿 파일 생성, 코드 생성, Spring Boot에서의 설정, Thrift 핸들러 클래스 구현 및 테스트 방법을 보여주었다. 이렇게 하므로써, 클라이언트/서버 통신이 실제 클라이언트와 동일한 방식으로 수행되어 서비스 사용 편의성이 향상된다.
참고
- Building Microservices with Spring Boot and Apache Thrift. Part 1
- jruyi/thrift-gradle-plugin | GitHub